Setting up shipping in WooCommerce
This post has come about as a result of a problem I had to address which I posted on the Facebook Insaka eCommerce Community group, unfortunately there were more questions than answers and it turned out I wasn't the only one who had issues to solve, I did manage to find a solution to my problem which I posted on the above community group. It was then that I discovered others had similar problems to solve. Hence the reason for this blog tutorial.
So we all now realise that there can be some complexities to shipping products, the problem I had to address was that my customer in the USA runs a non-profit organisation which sells things on their website to raise funds, in this case it was a book and some special coins. He wanted to assign a shipping cost of $3.75 to 1 order of the book, and then plus $2.00 for each additional book ordered, I'd never heard of this but was told it is quite common in the USA this is where my research started. However, we can't apply the same shipping cost to both items so the first thing to do is set up some shipping classes.
Creating Shipping Classes
If you are the developer or owner of your website you should be able to login to your WordPress back-end, once logged in click on WooCommerce, then settings from the options that appear you will see this

Now click on the shipping TAB to see

Just below the TABS you will see the options "Shipping zones | Shipping options | Shipping classes" right now we are interested in the shipping classes so click on that option. This is where you will create a shipping class to assign to each product type that has different shipping costs, you'll see a button that says "Add shipping class" click on that. This what you should see:
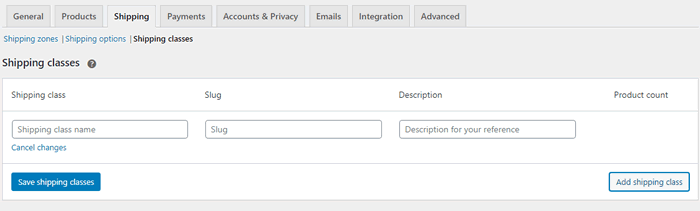
There are only two boxes you need to worry about filling in "Shipping class name" and "Description" you can put anything here but use something that makes sense to you, I used BOOKS as the shipping class name and CLASS FOR BOOKS under description, you will need to add a class for each product type that has different shipping costs/requirements. So go ahead and create the shipping classes that you need. Don't forget to save the shipping classes when you're done.
Next thing we need to do is allocate the shipping classes we have just created to the products they belong to.
Assigning Products to a Shipping Class
Ok you're still in the back-end in the left hand black column click on "Products" it should be just below WooCommerce
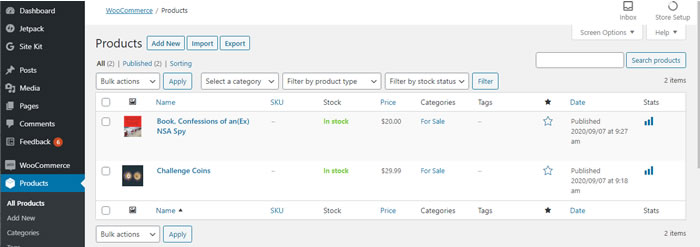
As you may have guessed this is from the website I had to work on, you can go take a look if you wish www.intelreform.org, I also chose this because there are only two products so easier to show, so howver your mouse cursor over the title of the product you need to allocate a shipping class to, and select EDIT from the options that appear (NOT quick edit). Once the product is opened for editing scroll down the page until you see this..
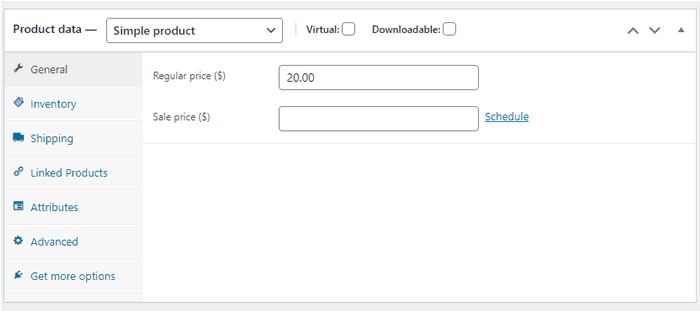
Do you see the list of options down the left hand side? Select Shipping
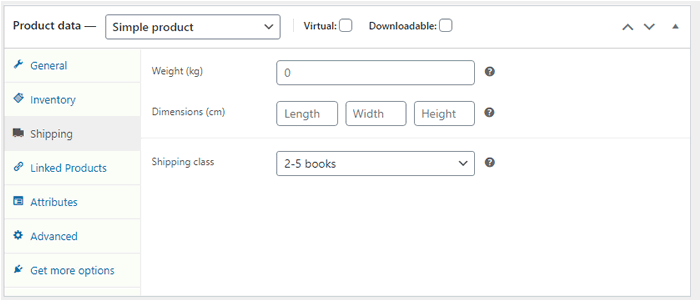
More or less in the middle of that box you will see the label "Shipping class" in the box to the right click on the drop down arrow, and select, from the list of classes you created earlier, the class that should be assigned to this product. Don't forget to save the changes.
Shipping Zones
Shipping zones are geographical areas to which you ship your products, you can have a main overall area and the regions withing that area, so for us in South Africa you could have South Africa as your main zone, and then all the provinces as regions within that zone. But let's go ahead and take a look goto WooCommerce/Settings -Shipping TAB to see this
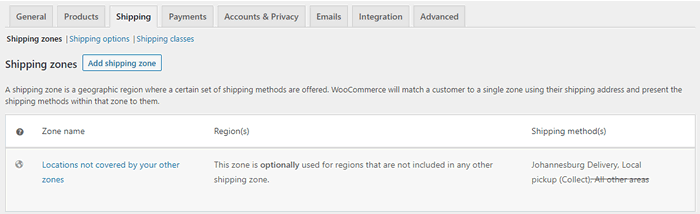
Shipping zones are the first of the three choices, so now click on the "Add shipping zone" button to see this.
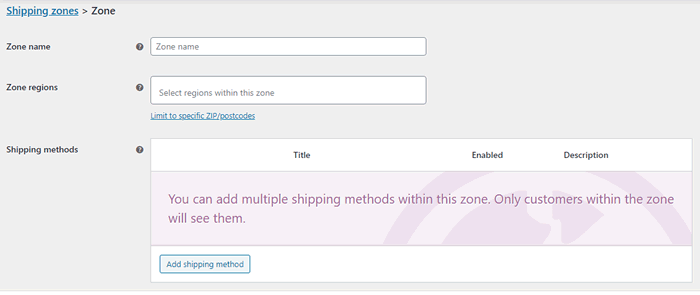
Now go ahead and add your main shipping zone in the top box, then if you click in the next box down, you'll see it will give you the opportunity to select country and regions within that zone, See the image now since I have added all the provinces.

next thing we will look at is shipping methods, click on the "Add shipping method" button
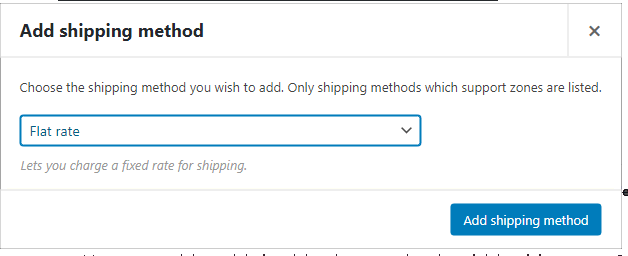
If you click on the drop down arrow you will see there are three (3) options to choose from Flat rate, Free shipping and local pickup. Free shipping and local pickup are pretty self explanatory and no further explanation is required. Flat rate offers a few more options, especially if you have created product classes as you will see shortly. So now select "Flat rate" from the options and click on "Add shipping method" this is what you will see below the zones you just created..
We're not done yet, hover your mouse cursor over the line where is says "Flat rate" and select edit.
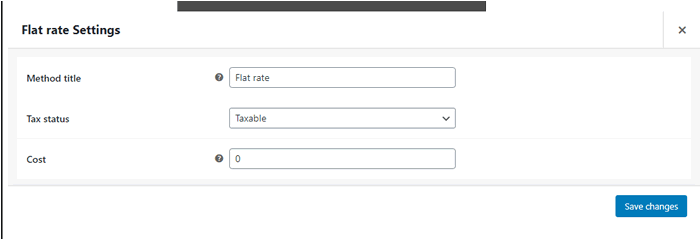
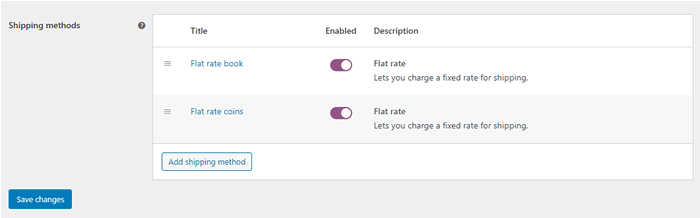
Here should be fairly self explanatory the Method title can be anything that makes sense to you, Tax status, again self explanatory and finally cost is where you can place your shipping calculations, this will now apply to all goods shipped from your store which I am sure is not what you want. Now take a look at what happens when you have created shipping classes. Let's briefly go back to the American website mentioned earlier where there were two products to sell asnd we set a ship[ping class for each product, as a reminder you can see here that I have created two shipping methods, one for books and one for coins.
Now I will edit one of them to see what happens when you have shipping classes.
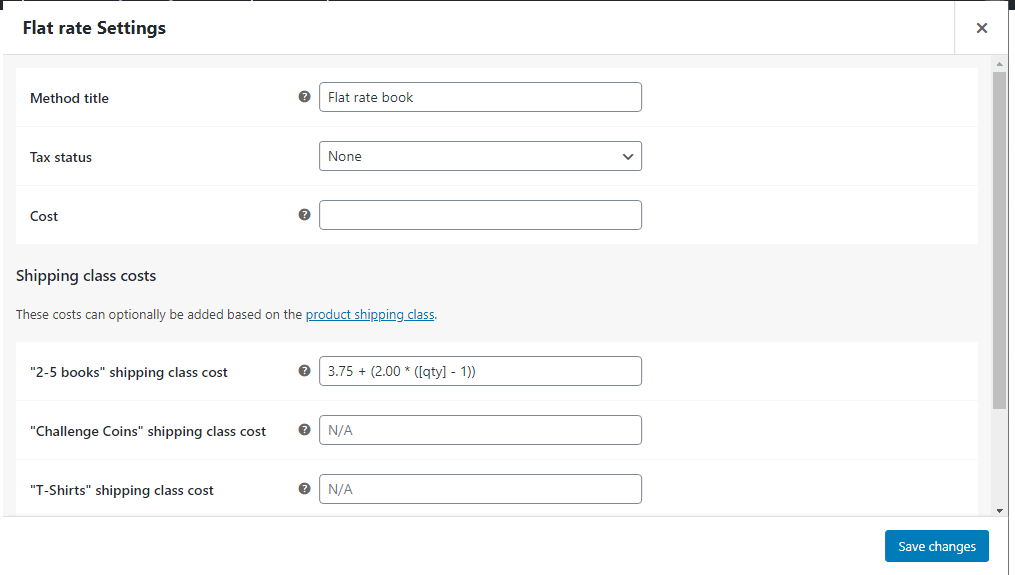
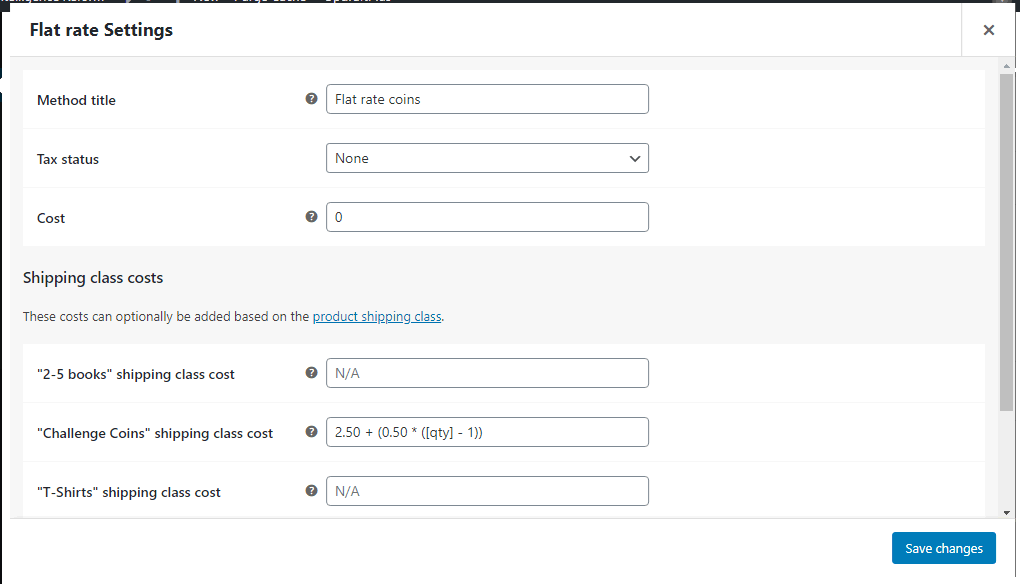
Notice now that all the shipping classes you set for each product are also visible and you can now set a shipping rate for each class, leave to the "Cost" option and set the shipping formular/cost for each class, I have found from experience that it works better if you create a flat rate for each class, even though all classes are shown. In the image above you can see I set a flat rate called flat rate books and placed the shipping formula in the box next to the books shipping class label. Watch closely to see how the Flat rate settings for coins is slightly different,
Recent Comments